
12 x 12 cover made from 2x6x12
Purpose:
I built a cover because it was just not comfortable in the uncovered location.The size of the unit was so large I couldn’t get it into the house space, so I got the max span of a 2×6 and it was 12′. I just winged it and it cost in the long run for lack of planning, i am building another for a car cover and this time will maximize material use and have the first run errors corrected
🛠️ How I Built a 12′ x 12′ Hot Tub Roof Cover (and Fixed My Material Mistake)
I built a simple 12′ x 12′ roof over my hot tub using standard 2x6s and plywood, but I ran into a sizing issue that threw off my whole layout. Here’s how I fixed it, with a clean plan that fits rafters, plywood, and posts exactly without waste.
⚠️ The Problem
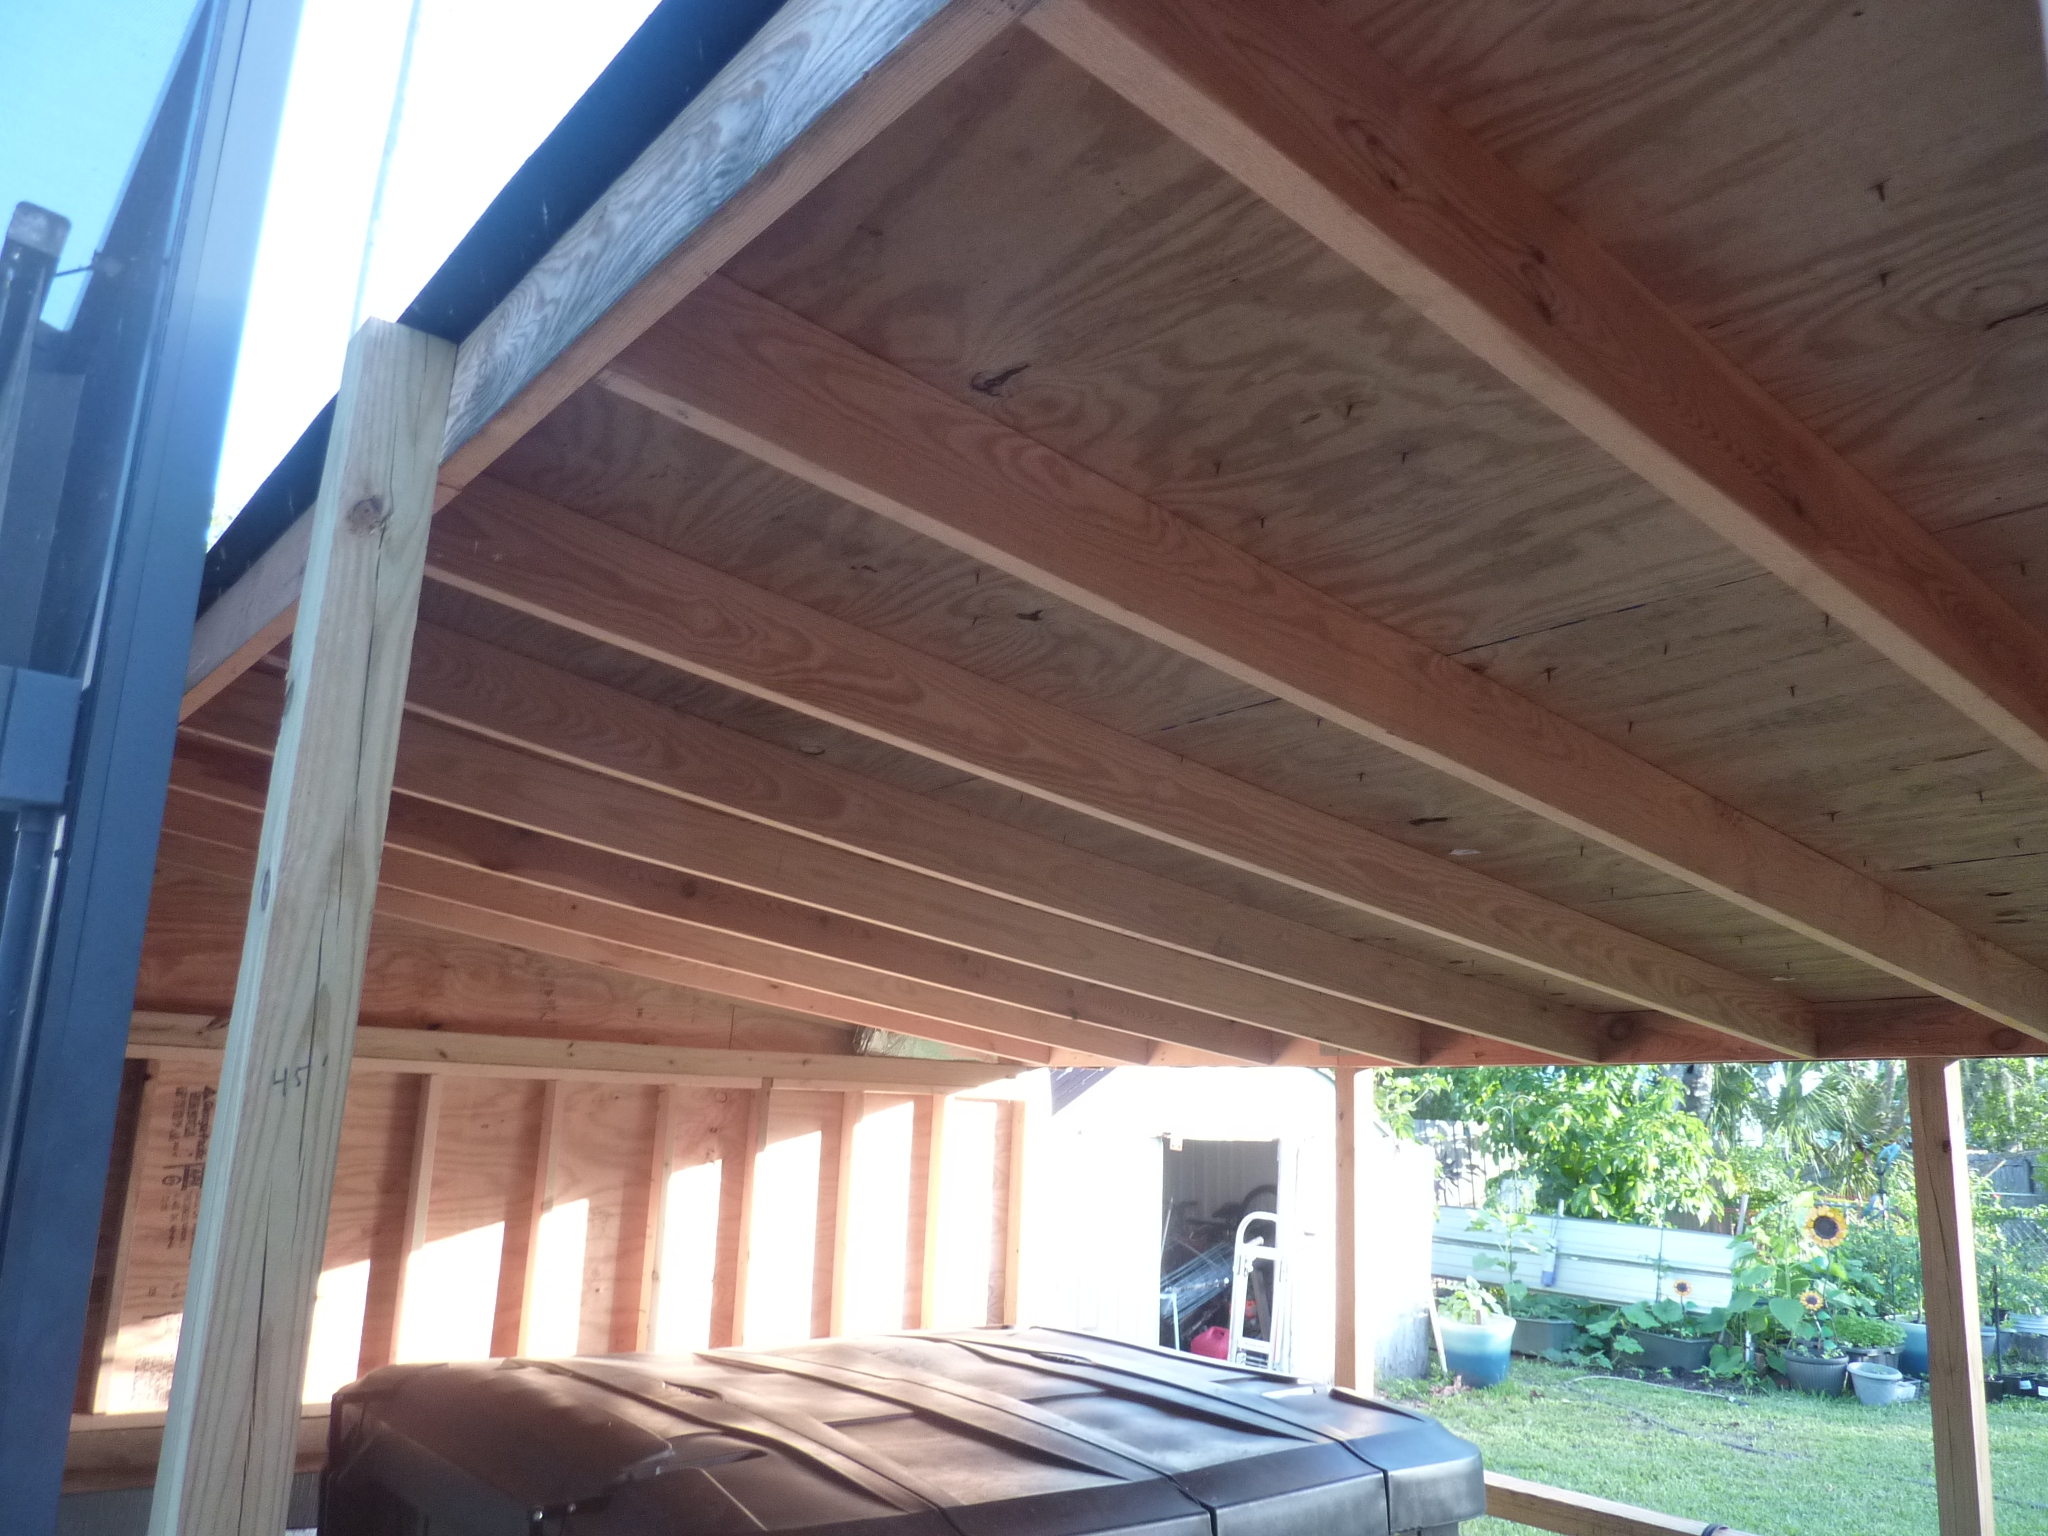
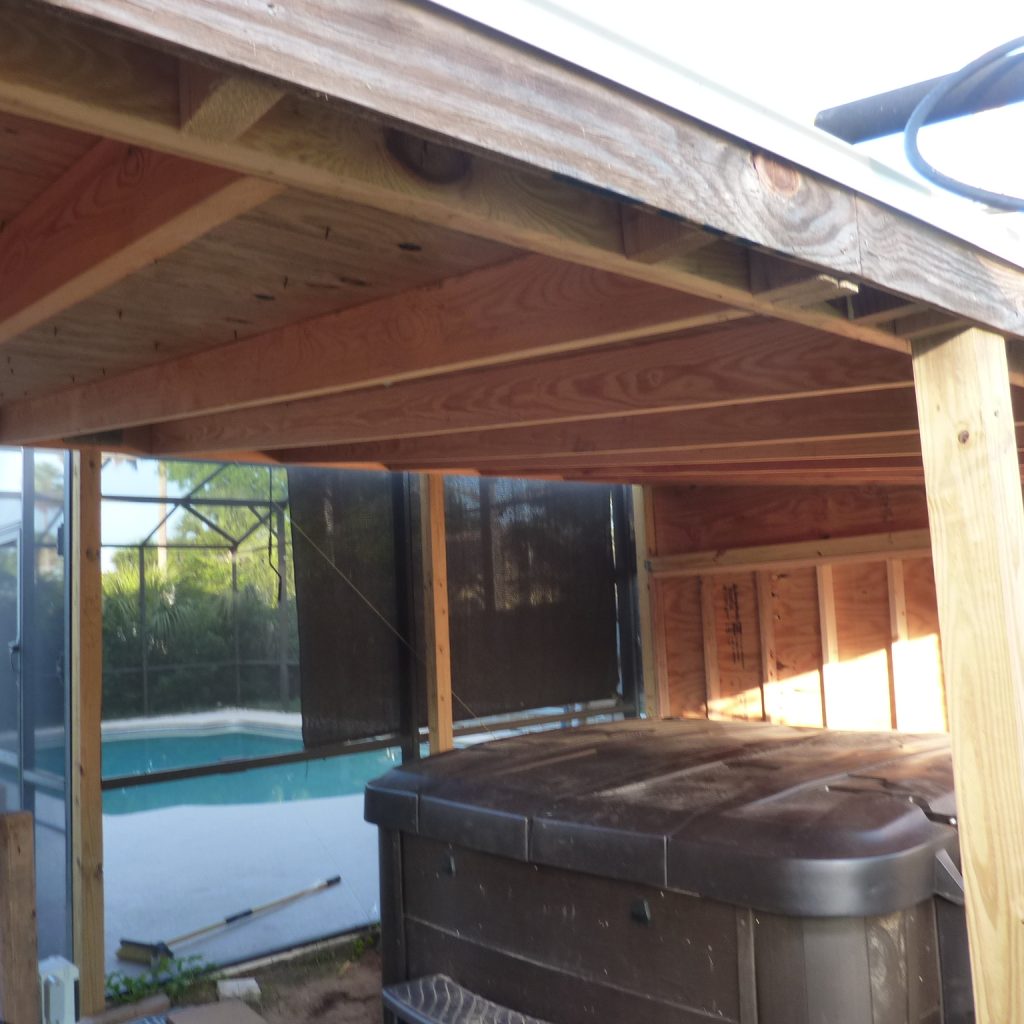
I used full-length 2x6x12′ boards as rafters, but also added 2×6 end plates on both ends. That added 3 inches total to the span, meaning my roof became 12’3″ wide. Unfortunately, 4×8 plywood sheets only cover 12′ – so I was left short.
✅ The Fix
- I didn’t, i had to add for the 3in so at that point i added more to cover the 4×4 posts
- Used full-length 2x6s as end plates (1.5″ each side), after the 8in addition I cut plywood for a facia
- Even with the 2×6 rafters cut there is still the issue od the 4×4 posts exposed at the tops
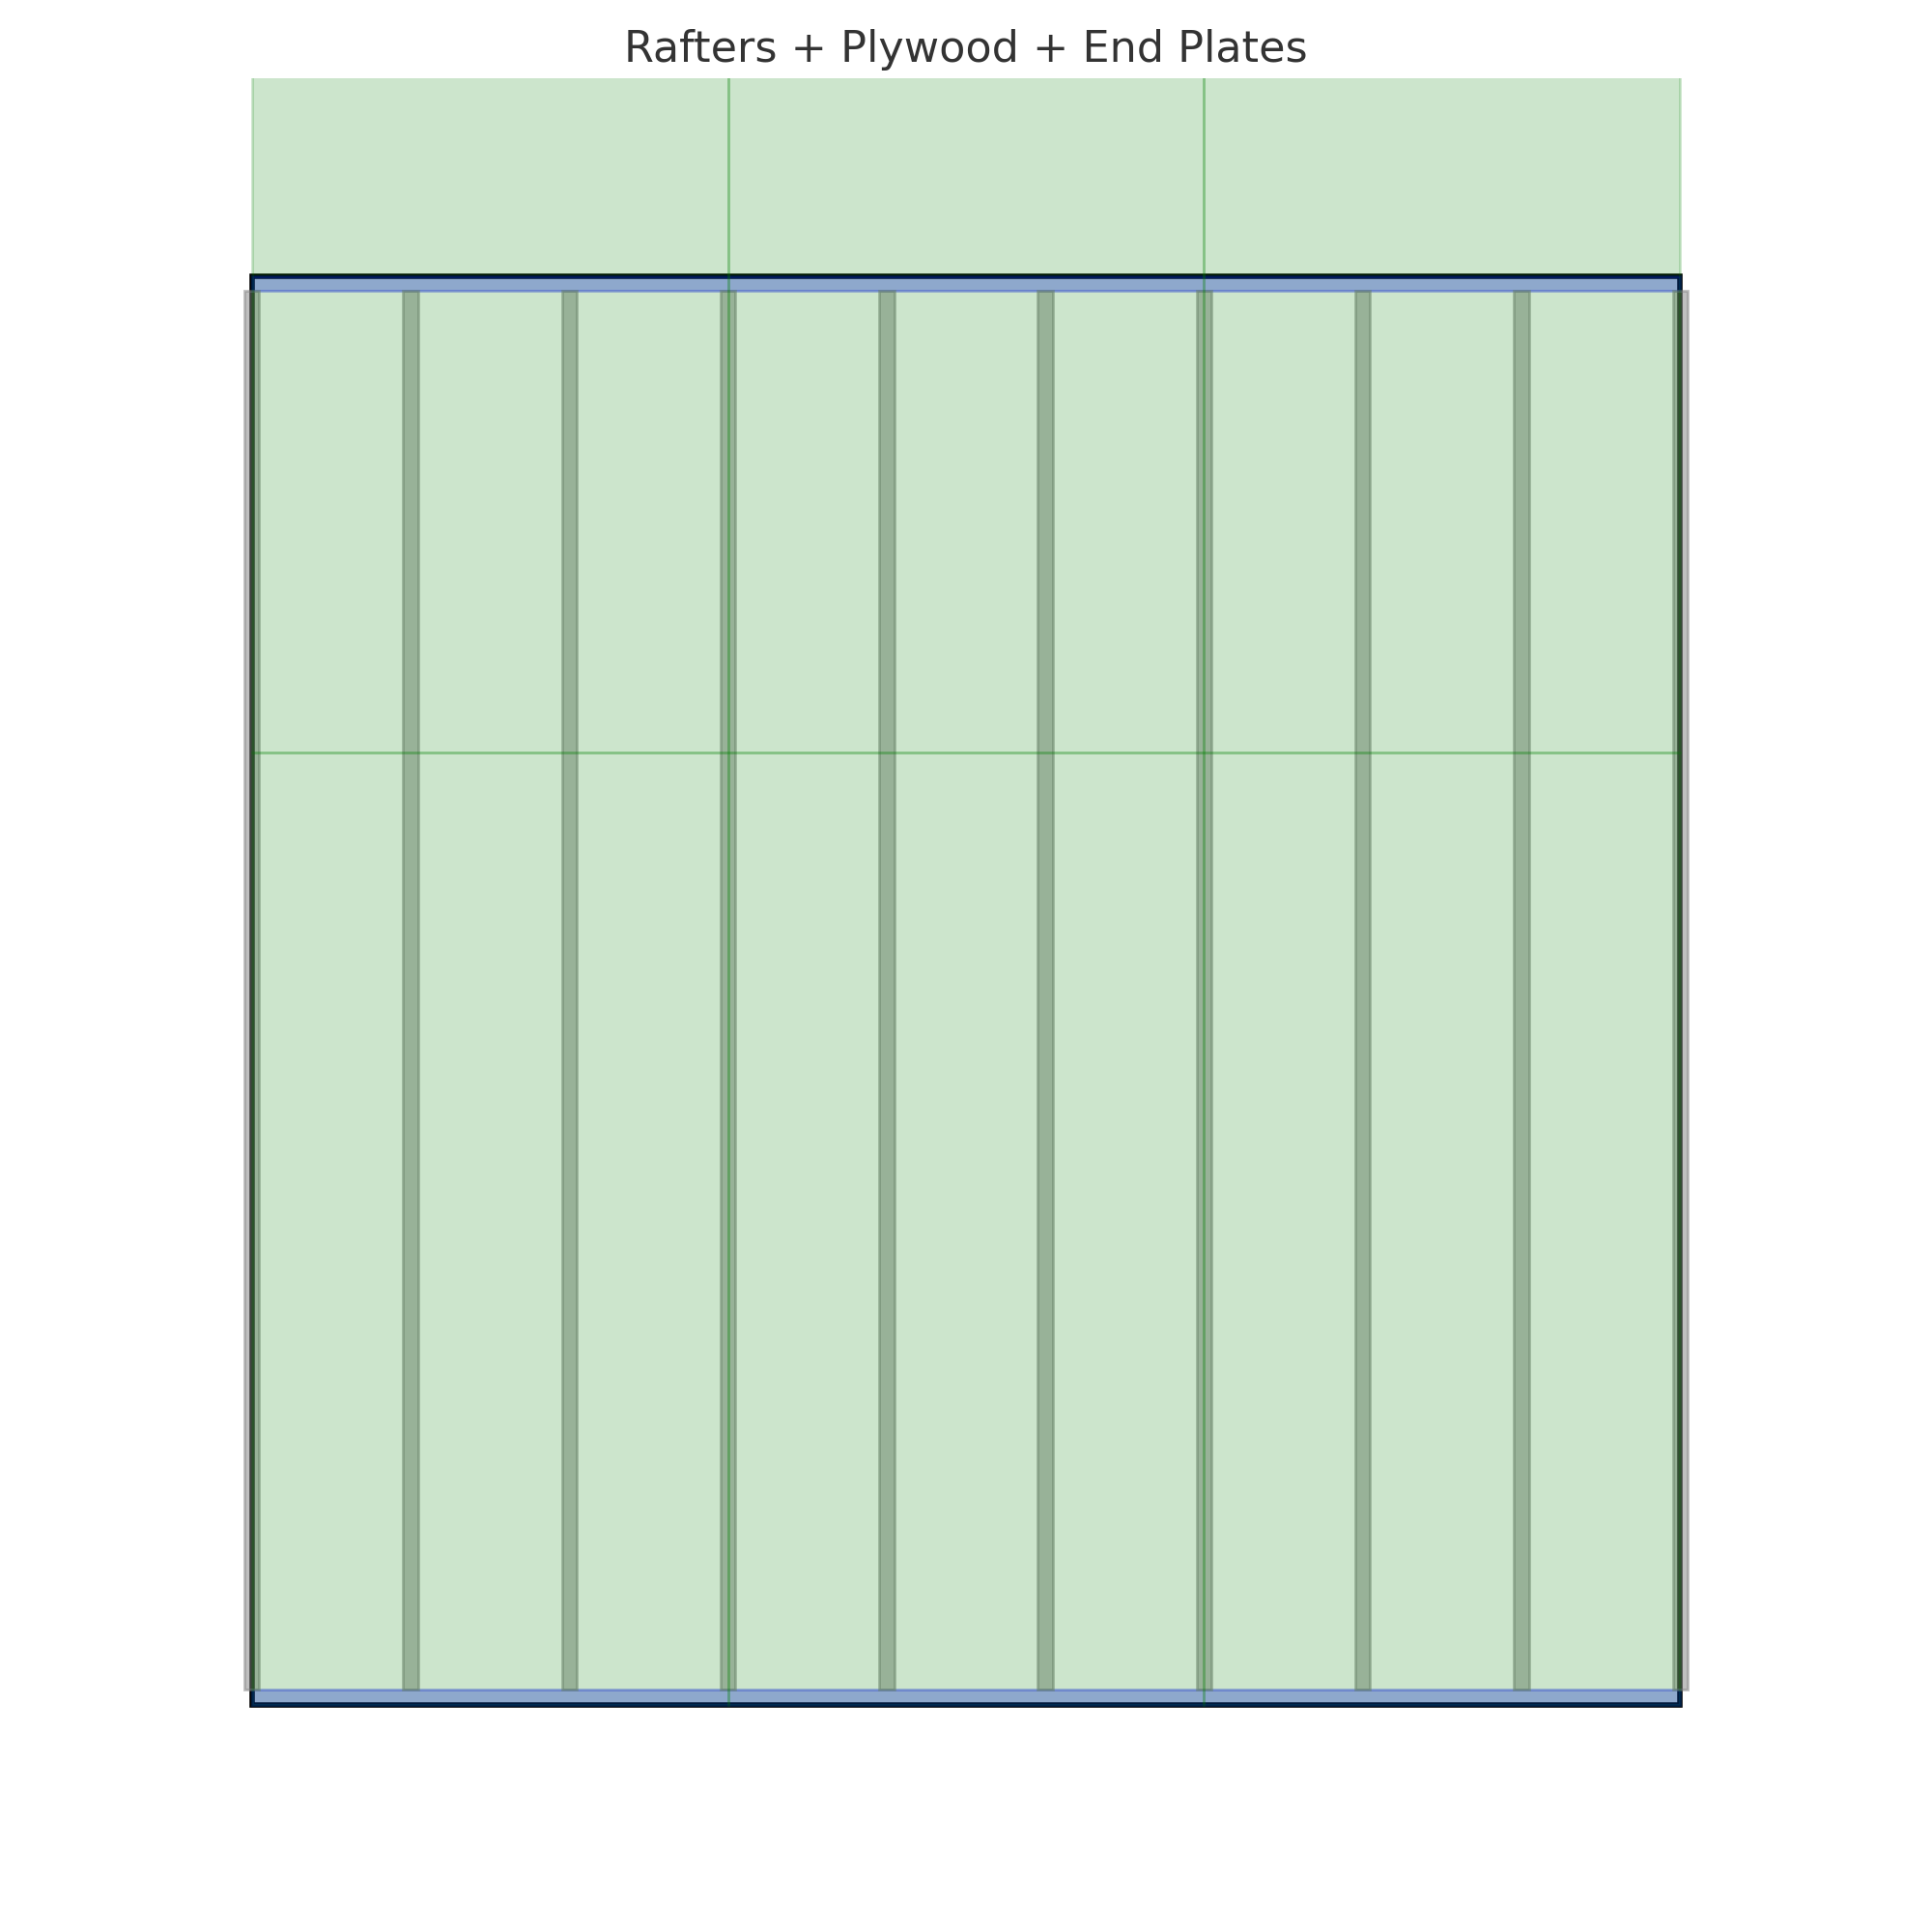
📏 Rafter Layout (16″ O.C.)
With rafters spaced 16″ on center (O.C.), here’s the resulting layout:
- 9 total rafters per direction (starting at 0″, ending at 144″)
- Plywood sheets run 3 across × 2 down, trimmed to match 12′ x 12′
🖼️ Rafter and Plywood Layout
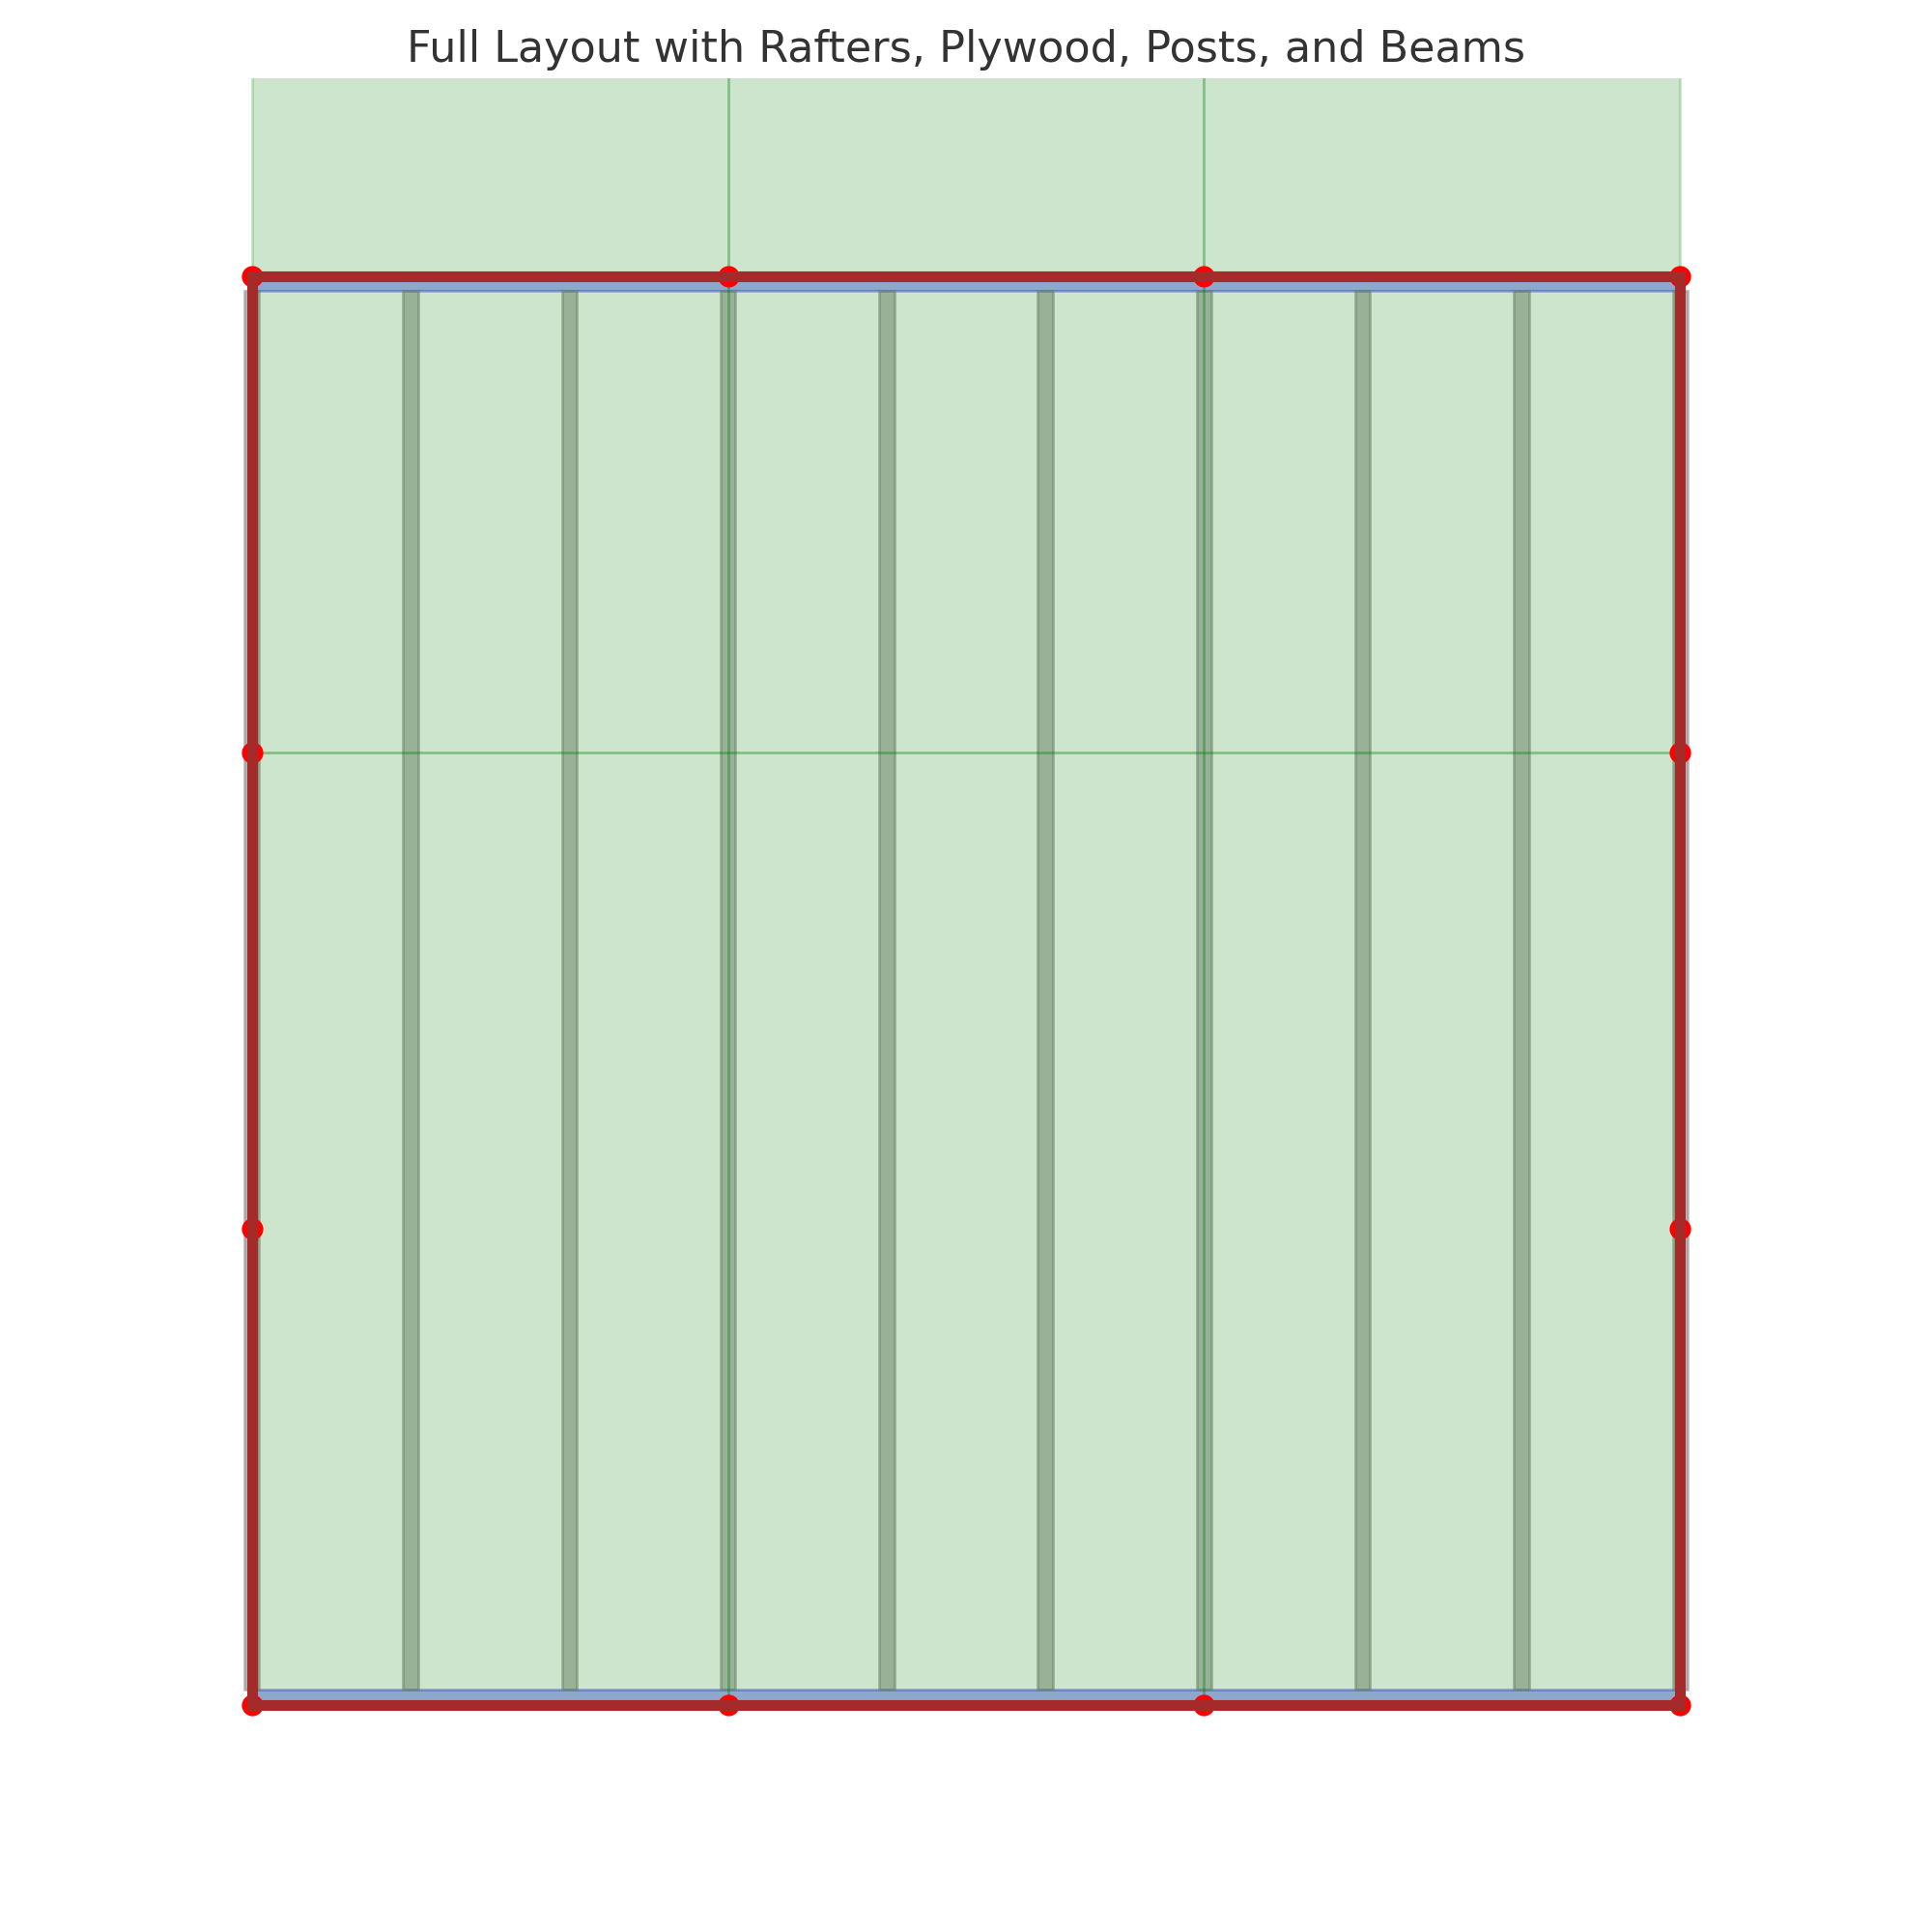
🧱 Post and Beam Layout
- Posts: 4×4 pressure-treated spaced every 4 feet around the perimeter (12 total)
- Beams: Doubled 2×6 or solid 4×6 perimeter beams
- Rafters rest on top of beams using hangers or notched joints
🧰 Final Thoughts
If you’re framing with sheet goods like plywood, always subtract for lumber thickness—especially when using outer rim joists. That small 3″ overshoot almost ruined my whole plan.
My next build which is why i am posting this and using AI for some layout assistanceI want the 4×4 posts under the roof on both ends.
📐 Post Placement: 12′ x 12′ Roof
To keep the posts directly under the beams and fully support the roof, use a 3×3 grid layout with 4′ spacing between post centers.
- Total posts: 9
- Spacing: 4′ (48″) center-to-center
- Layout: 3 per side, forming a square support grid
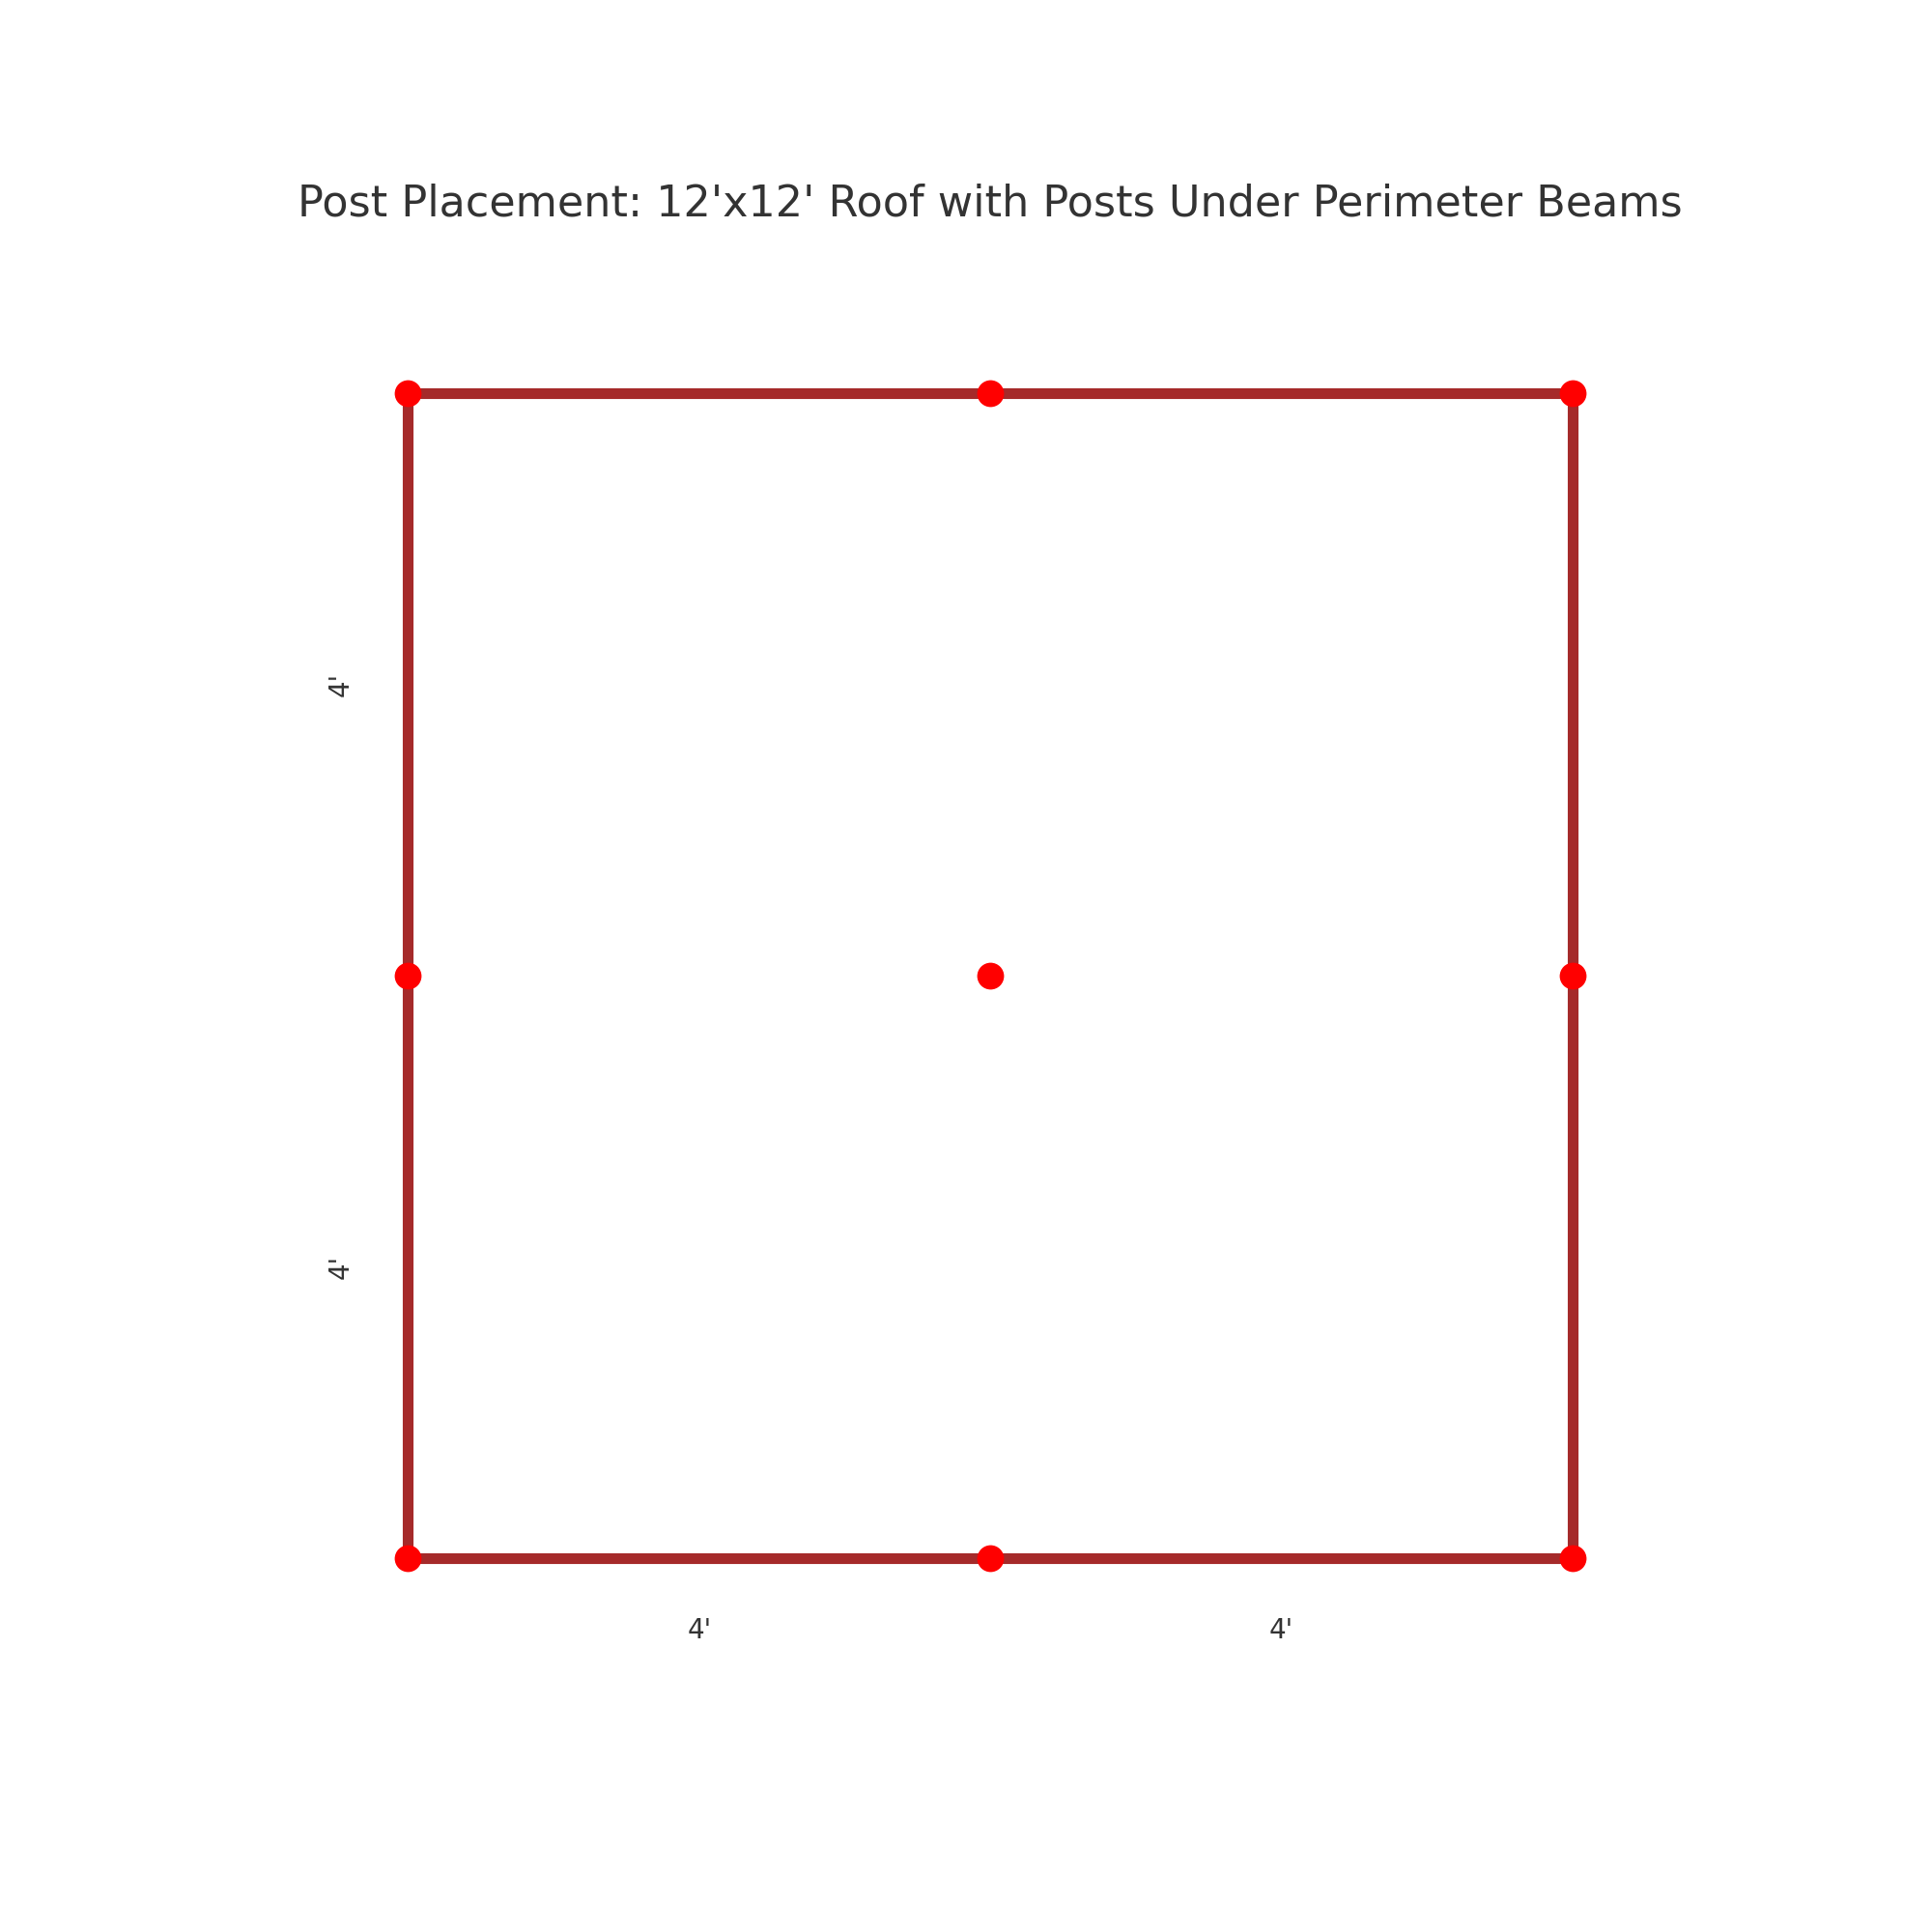
Each post supports the beam directly above it. You can anchor them into concrete piers or blocks, depending on your site conditions. This layout prevents sagging and keeps the structure tight and square.
Here’s a full material list for a 12′ x 12′ hot tub cover using wood framing, plywood sheathing, and 4×4 post support — based on the final layout we’ve discussed:
🧰 Material List – Wood Framing
🪵 Framing Lumber
| Qty | Size | Purpose | Notes |
|---|---|---|---|
| 18 | 2x6x12′ | Rafters | Cut to 11′ 9″ each |
| 2 | 2x6x12′ | End plates | Full-length across 12′ span |
| 4 | 2x6x12′ | Beams (doubled sides) | Double up for strength (front/back) |
| 4 | 2x6x12′ | Beams (doubled ends) | Double up on sides (left/right) |
Total 2x6x12′ boards: 28
🧱 Posts
| Qty | Size | Purpose | Notes |
|---|---|---|---|
| 9 | 4x4x8′ PT | Vertical posts | Cut as needed for level height |
🪵 Sheathing (Roof Decking)
| Qty | Size | Purpose |
|---|---|---|
| 6 | 4x8x5/8″ or 3/4″ Plywood | Roof sheathing |
🔩 Hardware & Fasteners (Estimates)
| Qty | Item | Notes |
|---|---|---|
| 36 | Joist hangers (2 per rafter) | Simpson LUS26 or equivalent |
| 9 | Post bases or anchors | Simpson or galvanized steel brackets |
| 100+ | 3″ Deck screws or structural screws | For framing and sheathing |
| 1 box | 8d or 10d nails | Optional, if nailing instead of screws |
| 1 box | Simpson Strong-Tie screws | For hangers and hardware |


