A
admin
2026-04-30 12:46:59
https://www.24vids.com/shorts/one-strategy-to-counter-russian-fiber-optic-fpvs-involves-repurposing-target-p-tw-1889993881212846495?utm_source=share&utm_medium=social&utm_campaign=user_share
Login to add a comment
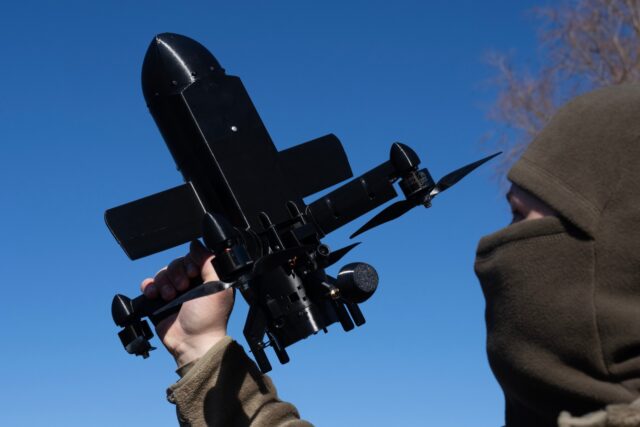
The drone carried a Soviet RPG warhead from 1961, unwound a hair-thin fiber-optic cable behind it as it flew, and approached a target whose entire defensive logic was built around a frequency the drone was not transmitting on
Login to add a comment
Governments have long pursued methods to influence thought and behavior, from MKUltra’s LSD experiments to modern surveillance capabilities. Smartphones, now ubiquitous extensions of daily life, collect intimate data on location, habits, and even biometrics. Pair that with AI systems trained on vast datasets, and the potential for manipulation—whether by state actors, corporations, or rogue code—grows exponentially. What begins as “consciousness exploration” can devolve into tools of control when divorced from moral restraint.
Login to add a comment

Login to add a comment
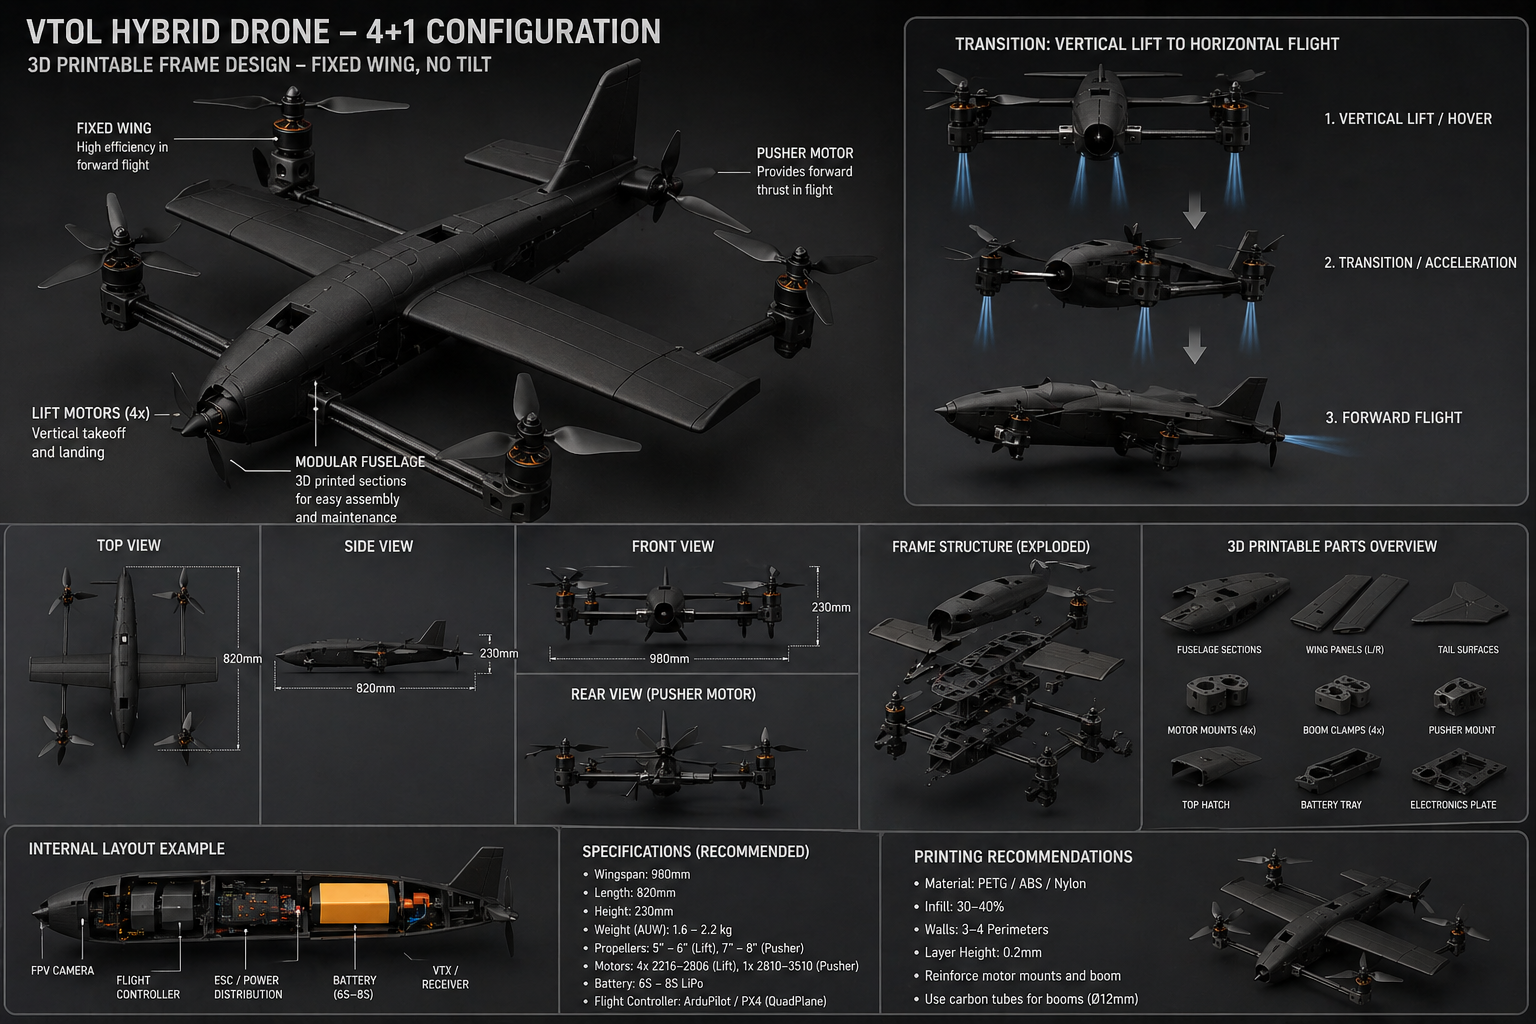
i am trying to print this
Login to add a comment
anyone want to build this
Login to add a comment
Login to add a comment
Flow

Login to add a comment
Login to add a comment
💬 Comments (0)
Login to add a comment