A
admin
2025-10-27 05:34:40

DEI

Login to add a comment
(Maker-Fixer Edition)
Your old Ni-Cd charger can live again. It’s got the guts — transformer, rectifier, and housing — it just needs brains. We’ll keep the power section and add modern control so it can safely charge Li-ion tool packs or custom builds.
Example:
If you’re charging a 3-cell (3S) Li-ion pack, set the buck converter to 12.6 V output.
For a 4-cell (4S) pack, set it to 16.8 V.
Ni-Cd charger (+) → input of buck converter
Ni-Cd charger (–) → input of buck converter
Buck converter output (+) → BMS “B+”
Buck converter output (–) → BMS “B–”
Battery pack wires → BMS board according to your cell count (B1, B2, B3, etc.)
Your tool or device connects to the BMS “P+” and “P–” pads.
Your Ni-Cd charger’s job now is simple: be the power brick.
The buck converter and BMS do the thinking.
No more junk drawer electronics — just a solid, functional Li-ion charger that fits in your maker space.
Login to add a comment
router setup
• Dell router with UFW firewall, DHCP, NAT, Nginx reverse proxy
• Nginx on Dell proxying localad.us and photola.us to Apache
Login to add a comment
The global elite learned a long time ago that real control doesn’t come from force… it comes from fatigue. Make people tired, sick, and hopeless, and they’ll pretty much do whatever you want.
Login to add a comment

Login to add a comment
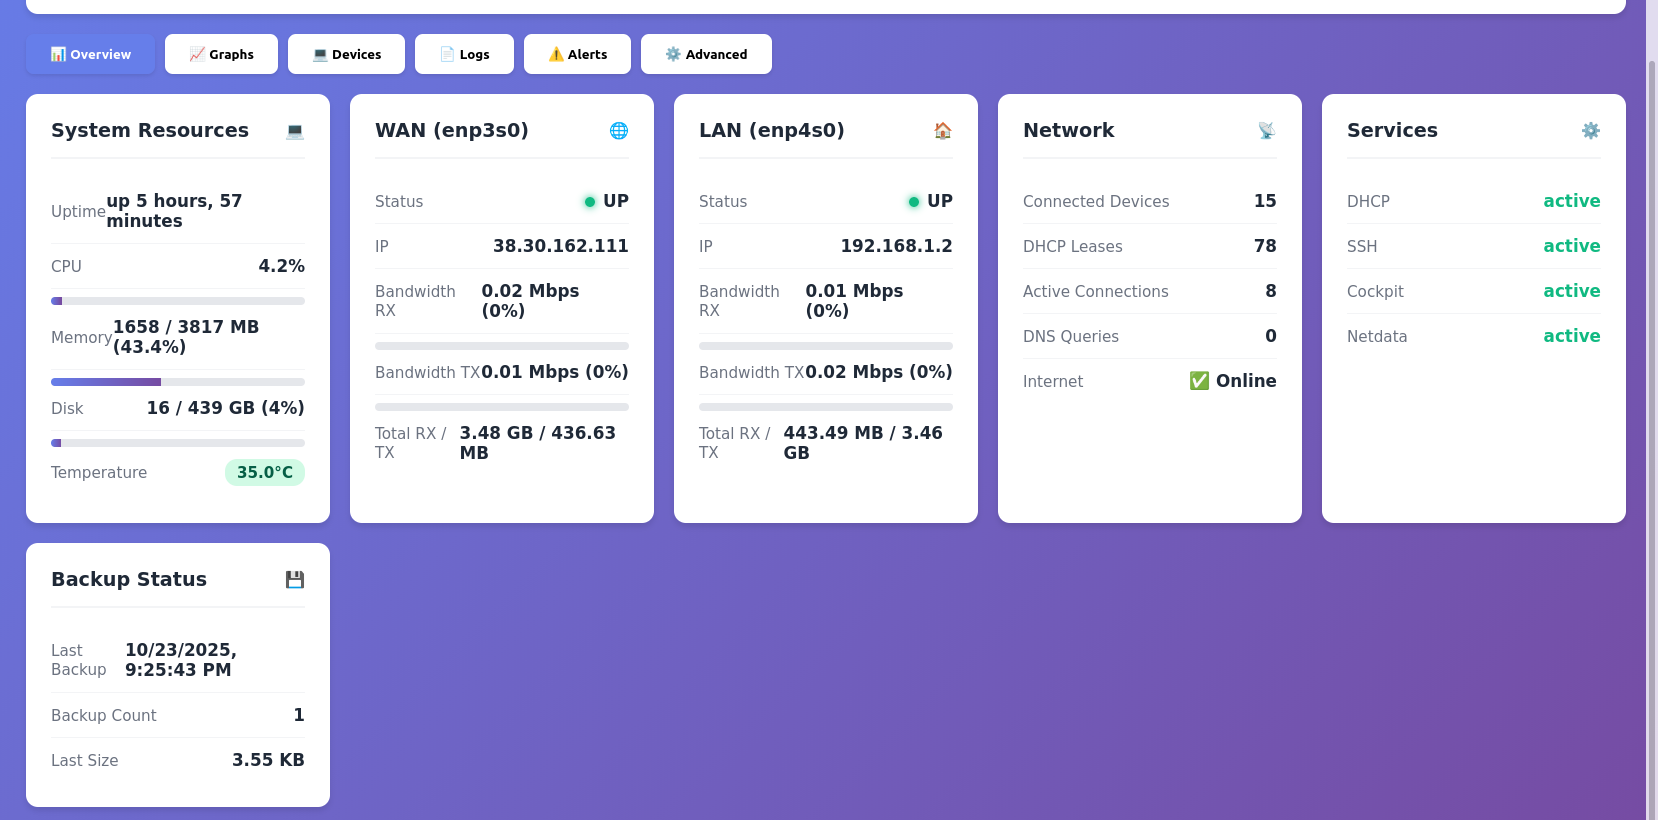
setup dell optiplex 6th gen intel pc as a router, created this admin panel in claud.ai super clean
Login to add a comment
Server setup with static ip
Plan:
1. Install Nginx on Dell as reverse proxy
2. Configure virtual hosts in Apache (iMac) for 10 domains
3. Point all 10 domains to your static IP via DNS
4. Route traffic through Dell to Apache by hostname
5. Create separate endpoint for AI service (auth-protected)
6. Set firewall rules on Dell to allow only necessary ports
Login to add a comment
Login to add a comment
doing inside cuts

Login to add a comment
💬 Comments (0)
Login to add a comment